We released a new parts editor in version 0.7.9 of Fritzing, so these tutorials are currently out of date. The instructions about how to create graphics outside of Fritzing are still correct, but the specifics of how you use Fritzing's parts editor have completely changed! For more info see this blog post.
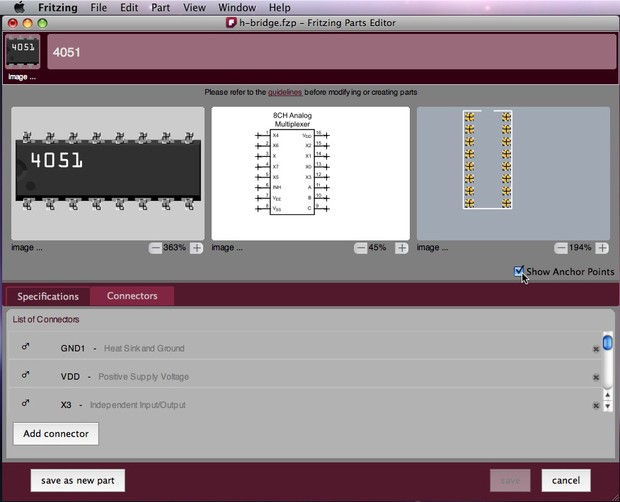
In the connectors tab you can specify the individual connectors of your part. This is done in three steps:
- Add a connector pin - the connector pin represents the active connection area, that is the area where wires can attach to your part. To add a connector pin, simply press the "Add connector" button in the List of Connectors. A new connector is added to each of the graphics and to the list. Select the new connector in the list, click it again and fill out the Name and Description fields (according to the part's data sheet, for example Name: VDD ; Description: Positive Supply Voltage). You can change the type of the connector between male and female by clicking the icon to the left of the name field. When you´re done, click Accept.

- Position and resize the connector pin - this must be done in each of the three graphics. Just drag the connector pin and place it at the proper location (for example on the part's leg). You can also resize a connector accordingly by pulling its corners. The zoom function allows you to place and position your pin connectors much more accurately, so keep it in mind!
- Position the anchor point (optional) - Anchor points represent the point of connection and influence how wires and traces extend from your part. In the Breadboard View the terminal point will be the end of your pin, where the wire will connect. In the PCB View the terminal point will define traces and holes in the physical PCB. Check the Show Anchor Points box, and drag the little '+' sign in each view to the proper location. If you do not position the anchor point, it will be automatically positioned at the center of the connector pin.
When you're done, click save as new part.
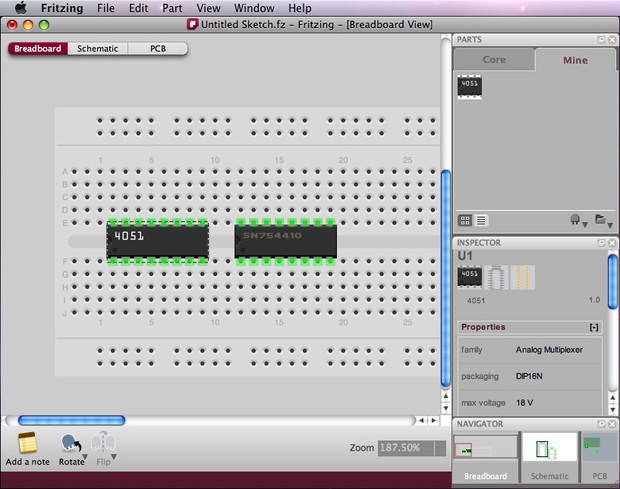
That was it... your new part is now saved in the "Mine" bin. Before you start using it, go on to the next step to test and make a quality check for your part.