
Fritzing is an Electronic Design Automation software for designers, artists and just anyone who has interest in physical computing and prototyping.
Fritzing's goal is to provide easy tools for documenting and sharing physical computing projects, producing layouts for Printed Circuit Boards (PCB) and teaching electronics.
If you wish to build robust prototypes, to bring your ideas into serial production and to join an enthusiastic emerging community, this is the place to get started...
Table of Contents:
- The Fritzing User Interface
- The Basic Workflow
- PCB Production
- The Fritzing Community
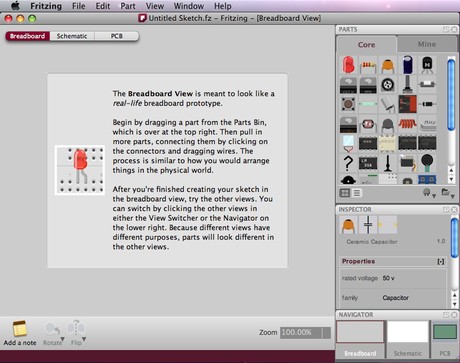
The Fritzing User Interface
Fritzing introduces a user-friendly interface for a quick and easy workflow.
Its environment sections include:
- The Project View - is where a virtual electronic circuit is built and edited in breadboard, schematic or pcb view. Learn more...
- The Palette Windows - include the Part Library, Part Inspector, Undo History and Navigator. Learn more...
- The Part Creator - is a tool to modify parts or create new parts for Fritzing (to open the Part Creator, select Part>New in the main menu). Learn more...
The Fritzing Environment can be rearranged by the user according to needs and preferences. The different sections and Palette Windows can be resized, moved, combined, hidden or shown as floats.
The Basic Workflow
A simple Fritzing workflow consists of the following steps:
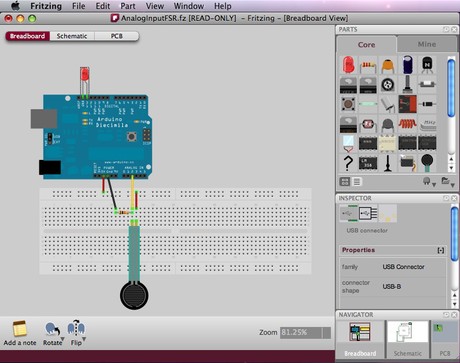
- Building a real circuit - it is very important that you first build a circuit in the real world and test it, before you rebuild it virtually in Fritzing.
- Rebuilding the circuit in Fritzing - this is done by dragging parts from the Part Library to the Project View and making connections. If you cannot find a part in the library, Fritzing lets you create your own part using the Part Creator. Alternatively, you can use the Mystery Part (icon looks like a qustion mark - ?), that will let you quickly define a new part and its connectors. Parts are connected using the breadboard and wires. Wires are created instantly by clicking & dragging a part's connector.
- Editing a circuit - drag & drop, copy & paste, multiple selection, rotation, undo history and more, are all functions integrated in the Fritzing environment sections and the menu bar. You can bend a wire by creating bend points. Just drag them them out of the wire. You can also add Notes (bottom bar menu) or Labels (right click on a part) to your sketch.
- Changing a part's properties - properties of parts can be found and modified in the Part Inspector in the Palette Windows section. When a part in the Project View is selected, the relevant part information will show up in the Part inspector.
- Switching between the Project Views - using the Navigator palette or the View Switcher, you can switch between the breadboard, schematic and pcb views. Any of these views can be used as the project's main working environment, and can be selected at any time.
- Designing a PCB - when the circuit is ready in Breadboard View, you can design a PCB layout in the PCB View. Fritzing features automatic routing and different export formats.
- Documenting a Project - a project can be documented and shared using the Export function in the menu bar.
Here are step-by step tutorials on how to build a circuit and how to design a PCB layout.
More advanced users should check the tutorial on how to create custom parts.
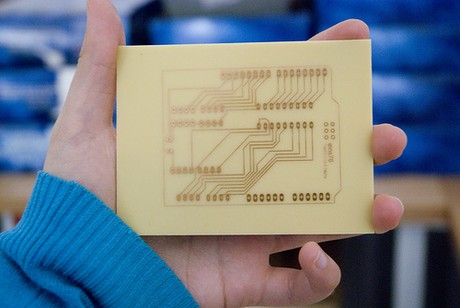
PCB Production
A Printed Circuit Board (PCB) can be made at home or in a small lab using DIY etching processes. It can also be done by professional PCB manufacturing services for more precise fabrication. Fritzing lets you design a PCB layout for both cases. Using the Autoroute function, you can automatically generate copper traces and achieve professional designs which could then be exported as Etchable PDF and Gerber files.
Learn more about designing a PCB and PCB production.
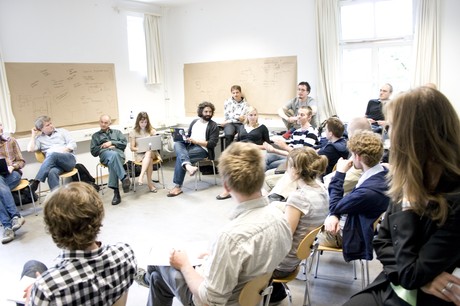
The Fritzing Community
We invite you to be part of our community of users for you to learn more about physical computing, to get to know other users and to contribute in the development of Fritzing.
Therefore we provide the following online features:
- Forum - get support, take part in discussions, exchange knowledge and make friends! Forum page
- Contributing - you can share your custom parts and projects with the Fritzing community, help develop the software code or even translate Fritzing into your own language... get involved
So... we really hope that this information was helpful to get started! Enjoy!