Fritzing lets you design your PCB in any size and any shape. When you start working on a new sketch, a default rectangular board is placed in the PCB View. You can then define width and height in the Inspector or alternatively resize the board by dragging its corners. You can use the shape popup in the Inspector to switch to an Arduino shield shape or an ellipse.
To use boards with more complex shapes, create your board's shape with an external SVG editor (Inkscape, Illustrator, etc.) and then import it to Fritzing. Follow these steps:
1. Design an SVG with two sub-layers:
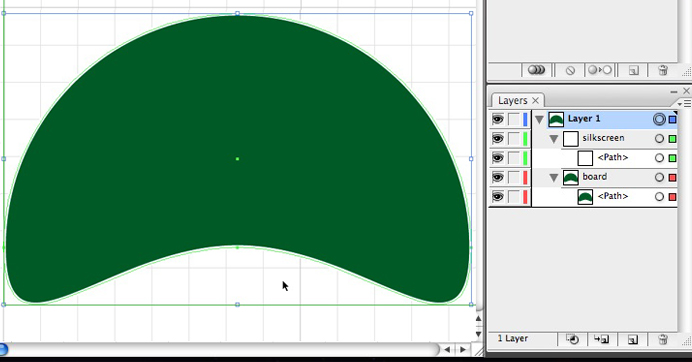
- A "board" layer with a path in any shape and size. The shape should be filled green and with no stroke.
Make sure you only have a single merged shape, not serveral distinct ones. If you want to display some guiding graphics (such as the location of the pin headers for the Arduino shield), you can add them as sublayers of "board". In this case, make sure you give the board shape item itself the id "boardoutline". That is to say, although we talk about "layer" the SVG attribute you actually set is "id". - A "silkscreen" layer with a copy of the path you've just done, this time with no fill and with white stroke (for Inkscape users: stroke = 8 mil). Make sure the silkscreen layer is arranged at the top. Remember to set the "id" attribute to "silkscreen", not the "layer" attribute.
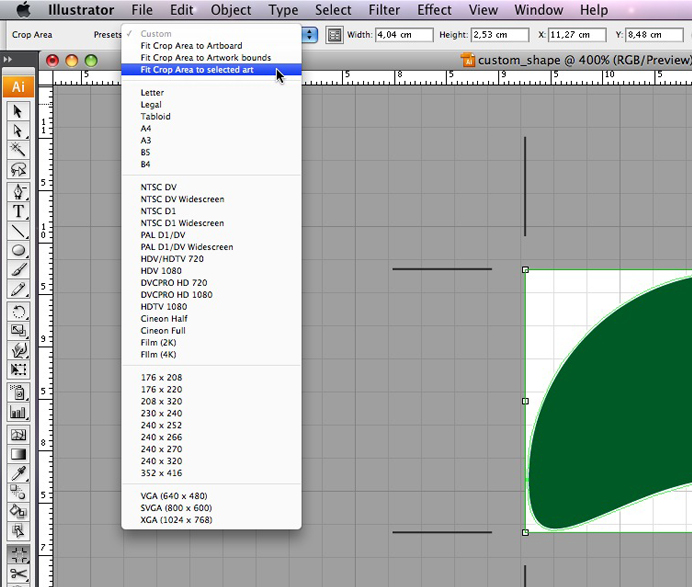
2. Illustrator Users: Align all elements to the center of the artwork
3. Illustrator Users: Use the crop tool and choose the preset "fit crop area to selected art"
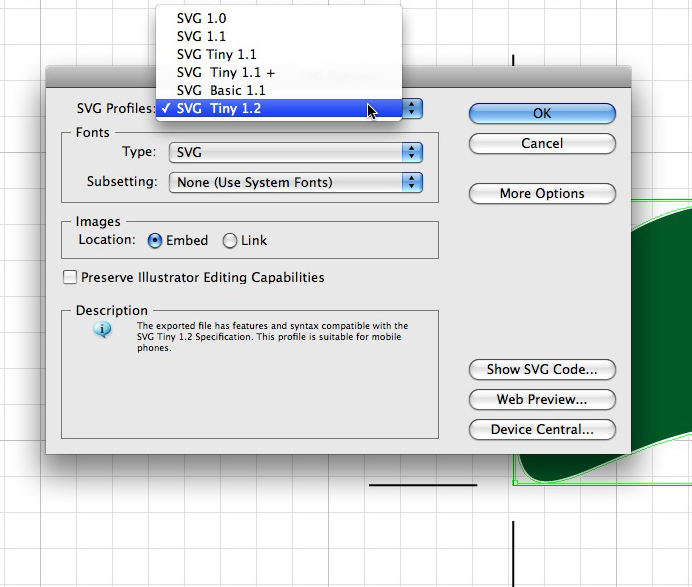
4. Save the file as an SVG Tiny 1.2.
6. Drag a plain PCB to the PCB View.
7. In the Inspector, select "import shape" from the shape drop down menu, navigate to the SVG file and press "Open". Your custom PCB shape is ready to use!
You can inspect this sample shape to get a further sense of the details. Note again the use of the "id" attribute.
Illustrator Users, please note. If you use Illustrator to make your custom board svg, and you notice that the board size is not correct in Fritzing, this is because Illustrator uses non-SVG-standard units for pixels. In Illustrator-world, there are 72 pixels per inch, but the rest of the svg universe uses 90 per inch. Fritzing usually catches this, but if it doesn't, try the following: open up the svg in an text or xml editor and find the width and height attributes in the top level (<svg>) element, which will have units of "px". Divide the value of the width and height attributes by 72, and replace the current attributes with that new number followed by "in". For example, if you see width="100px" replace it with width="1.3889in".
Inscape users, please note. When we say set the "id" to 'silkscreen' or 'board' or 'boardoutline' we do not mean the 'label' attribute. The 'id' is the very first text input area in the Object Properties dialog--the label is the second. You can also set this using the XML editor under Inkscape's Edit menu.
Inscape users, please note. We also strongly recommend that you save Inkscape files as "plain SVG" before you import them into Fritzing. You can choose this option by selecting 'Save As' and in the dialog that comes up, choose 'Plain SVG' from the "Save As Type" popup near the bottom of the dialog.