Adafruit HUZZAH ESP8266 Breakout and DS18B20

This project shows how to connect an DS18B20 in parasite power mode to the Adafruit HUZZAH ESP8266 Breakout Board. Project inlcudes: Arduino Code. Huzzah ESP8266 Fritzing Part
Introduction
The Adafruit HUZZAH ESP8266 Breakout Board was recently launched and is so much of fun :-)
It is basically an ESP-12 soldered on a breadboard friendly breakout board.
DS18B20 -- Versions
The DS18B20 is a digital Thermometer with 12 bit resolution using the 1-Wire Bus. There are several versions available:
- DS18B20, which can be powered 3.0V to 5.5V in parasite power mode or with exernal supply.
- DS18B20-PAR, which can be powered 3.0V to 5.5V in parasite power mode only
-
MAX31820PAR which can be powered with up to 3.3V in parasite power mode only.
(Note: Nearly all Arduino Boards have 5V on the pins -- so don't use this 18B20 version!
The HUZZAH has 3.3V on the GPIO pins, so we could use this version as well).
DS18B20 parasite power mode
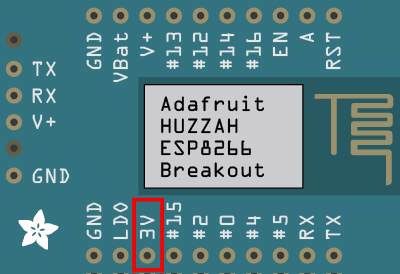
The HUZZAH Board has a regulated 3.3V power output, available at the "3V" pin:
External Pull-Up Resistor
If you don't know why pull-up resistors are needed then read this introduction.
For parasite power mode, I figured out that the external pull-up resistor should have a maximum value of 1.0 K Ohm. Stronger resistors will not work, i.e. the DS18B20 will not be able to get--quickly--enough the power on the DQ line for temperature conversation!
I have tested 1.0 K Ohm pull-up resistors, for both the DS18B20 and DS18B20-PAR.
The internal pull-up resistor should be enabled as well, see next section.
OneWire Library and Code
If you are using the latest version of the One Wire Library for the ESP-12, you can enable/disable internal pull-ups on the GPIO pins:
OneWire DS18B20(14, true);
Set parasite power mode:
byte parasite_power_mode = 1;
In the setup() block
- the one wire bus is scanned for DS18B20
- DSB20's rom code is read (with CRC)
- 12 bit resolution is set
The loop block
- Reads the temperature every 5 seconds (with CRC)
If the DS1820 doesn't get quickly enough the power for temperature conversations, the temperature reading will fail. However, the scratchpad can still be correctly read, but the value is just the one stored in EEPROM of the DS18B20--usually 85 degrees celsius.
Output
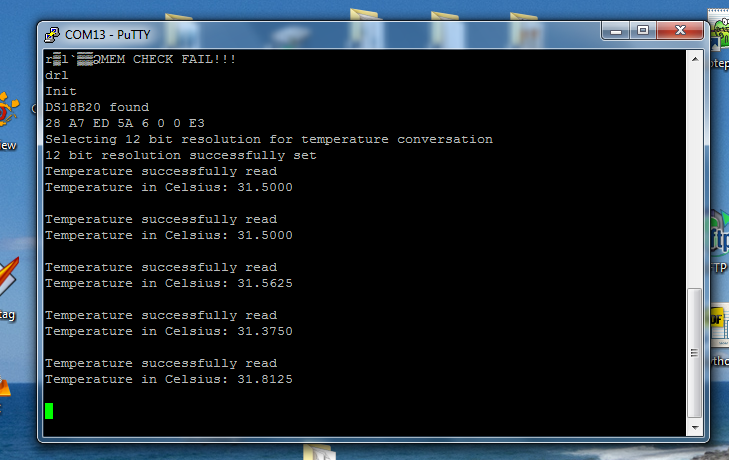
The output of the code is just on the serial port. So after flashing, connect to the serial port, e.g., with PuTTy with baudrate 115200:
Tools / Versions
- Arduino Board Manager: http://arduino.esp8266.com/staging/package_esp8266com_index.json
(Version 1.6.4-673, SDK 1.0.1) - Latest One Wire Library from GitHub
- Arduino IDE, arduino-1.6.5-r2-windows
- ATMEL Visual Studio 6.2, Service Pack 1
- Visual Micro for ATMEL Studio, Version 1505.19 SP6


