The tag 'led arduino rgb' is only used once. This is the project:
Blim Blim

Hello My name is Angel I am a beginner but this code I did (maybe that's why it's very simple) so if you put it into practice Thank you In this project a 3-color Led (red, green and blue) is used. The code is very simple. The Breadboard is something smaller for aesthetics but there is no problem if a normal one is used. Hola Me llamo Angel soy un principiante pero este codigo lo hice yo (tal vez por eso es muy simple) asi que si lo pones en practica Muchas Gracias En este proyecto se usa un Led de 3 colores (rojo, verde y azul). El codigo muy simple. El Breadboard es algo mas pequeño por estetica pero no hay proble si se usa una normal.


Materials
- 3 color led
- 3 resistors of 220 ohm
- Arduino UNO / USB Cable
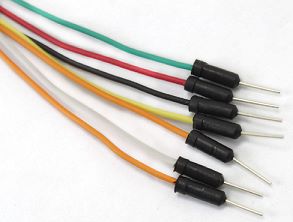
- 4 cables that will be used to connect to Arduino (I use:
- Black for the Earth
- Blue for the blue led part
- Green for the green part of the led
- Red for the red part of the led)
To assemble:
The Led connects to the Breadboard the cathodes (pins) of the led will be connected horizontally as shown in the diagram, as you can see in the led is a cathode longer than the others, the place where that cathode is connected The place where the black wire has to be connected and in the arduni goes to the GND (it will give the same result if it is connected to the ground where the POWER is located than in the one on the top of the digital part).
After connecting the earth is the resistors just at the bottom of the cathode (the earth does not carry because it is an output of the current). This fact connects the clays corresponding to each color to the opposite end to which they were previously connected to each cathode.
In the code is made to be pins 9, 10 and 11 but can be modified in the part that says pinMode by assigning another pin and in the part of digitalWrite equally by modifying the pin assigned.
If it is desired to change the speed of the LEDs, the delay is modified.
Thank you very much for viewing but using this project.
Materiales

- Led de 3 colores
- 3 resistencias de 220 ohm
- Arduino UNO / Cable USB
- 4 cables que se usaran para conectrase al arduino (yo use:
- Negro para la tierra
- Azul para la parte azul del led
- Verde para la parteverde del led
- Rojo para la parte rojo del led)

Armar:

El Led se conecta al Breadboard los catodos (pines) del led se van a conectar de forma horizontal como se muestra en el diagrama, como puedes observar en el led hay una catodo mas largo que los otros, el lugar donde se conecte ese catodo es el lugar dende se tiene conectar el cable negro y en el arduni va al GND ( va a dar el mismo resultado si se conecta en la tierra donde se encuantra el POWER que en el que se encuentra en la parte superior de la parte digital).

Despues de conectar la tierra se las resistencias justamente en la parte inferior del catodo (la tierra no lleva debido a que es una salida de la corriente). Hecho esto se conecta los clables que corresponde a cada color al extremo contrario al que se conectaron previamente a cada catodo.

En el codigo esta hecho para que sean los pines 9, 10 y 11 pero se pueden modificar en la parte que dice pinMode asignando otro pin y en la parte del digitalWrite igualemnte modificando al pin asignado.

Si se desea cambiar la velicidad de los leds se modifica el delay.

Muchas gracias por ver y/o usar este proyecto